Winter in Belleville brings more than just cold weather—it also means your home’s pipes are at risk of freezing and bursting. When temperatures drop, unprotected pipes can crack and cause costly water damage, leaving you scrambling for repairs. Protecting your plumbing now can prevent disaster later.
You need smart, practical steps that keep your water lines safe long before the worst cold arrives. This list gives you proven methods like insulation, air sealing, and simple habits that make a real difference. These tips are backed by expert advice and will help you avoid expensive emergencies.
Get ready to discover preventative strategies that anyone can use. You’ll find actionable tips to prepare your home for Canadian winters and keep your pipes flowing all season.
Table of Contents
- 1. Insulate Exposed Pipes For Maximum Protection
- 2. Seal Drafts And Gaps Near Pipes
- 3. Let Faucets Drip To Keep Water Moving
- 4. Open Cabinet Doors To Circulate Warm Air
- 5. Maintain Consistent Indoor Temperatures
- 6. Disconnect Garden Hoses And Drain Outdoor Faucets
- 7. Know How To Shut Off Your Water Quickly
Quick Summary
| Takeaway | Explanation |
|---|---|
| 1. Insulate exposed pipes effectively. | Protecting pipes with insulation reduces the risk of freezing by up to 80% during winter. |
| 2. Seal drafts around plumbing. | Sealing gaps in walls prevents cold air from reaching pipes, maintaining warmer temperatures where they are most vulnerable. |
| 3. Let faucets drip during extreme cold. | A slow drip keeps water moving, significantly reducing the risk of freezing in pipes with stagnant water. |
| 4. Maintain consistent indoor temperatures. | Keep your home’s temperature above 55 degrees Fahrenheit to prevent cold spots that can lead to frozen pipes. |
| 5. Know where your main shut-off valve is located. | Quickly shutting off water supply can minimize damage during a burst pipe emergency, reducing potential repair costs. |
1. Insulate Exposed Pipes for Maximum Protection
When winter temperatures drop in Belleville, uninsulated pipes in attics, basements, crawl spaces, and garages become vulnerable to freezing. Pipe insulation is one of the most effective ways to prevent costly freeze damage before it happens.
Think of pipe insulation like a winter coat for your plumbing. It traps heat that naturally radiates from warm water flowing through the pipes, preventing the water inside from reaching the freezing point. Without this protection, pipes in unheated areas lose heat rapidly when temperatures plummet.
Properly insulating exposed pipes in unheated spaces can reduce your risk of frozen pipes by up to 80 percent during harsh winters.
Where to Prioritize Your Insulation
Not all pipes need equal attention. Focus on these vulnerable areas first:
- Pipes running through exterior walls
- Water lines in attics and crawl spaces
- Pipes near basement windows or exterior doors
- Exposed pipes in garages and unheated rooms
- Supply lines entering your home from outdoors
According to experts, tubular pipe sleeves and fiberglass insulation work best for protecting pipes in exterior walls and reducing heat loss significantly.
Installation Methods That Work
You have several effective options for insulating pipes. Foam pipe sleeves are the easiest and most affordable option for most homeowners. Simply slip them over exposed pipes and secure with tape or clips.
For pipes in exterior walls, consider fiberglass batts placed around wall cavities to seal gaps where cold air penetrates. This dual approach stops heat loss from multiple directions.
In extremely cold climates or for pipes that run horizontally through unheated spaces, heat tape and heat cable provide active protection. These UL-listed products wrap around pipes and use controlled heat to keep water moving.
The Numbers Make Sense
Insulating exposed pipes costs between $50 and $150 per pipe run. A frozen pipe repair bill typically runs $3,000 to $25,000 depending on damage severity. The math is simple: invest in prevention now or pay for repairs later.
Pro tip: Start your insulation project before November arrives, so you’re protected before the first cold snap hits Belleville.
2. Seal Drafts and Gaps Near Pipes
Cold air infiltration is one of the biggest threats to your pipes during Belleville winters. Small cracks, gaps, and holes around your plumbing allow freezing air to reach pipes that would otherwise stay protected. Sealing these drafts is a straightforward way to maintain warmer temperatures around vulnerable water lines.
Think of drafts like tiny thieves stealing heat from your pipes. Every gap in exterior walls or around penetrations where pipes enter your home lets frigid outdoor air circulate directly against your plumbing. Even a small crack can drop the surrounding air temperature enough to freeze water inside the pipe.
Properly sealing drafts and gaps around pipes, combined with insulation, keeps surrounding air warm enough to prevent freezing even during extreme cold snaps.
Where Drafts Hide
Drafts don’t announce themselves. Look for these common problem areas around your home:
- Gaps where pipes penetrate exterior walls or foundation
- Cracks around basement windows near water lines
- Holes in rim joists or band boards
- Spaces around doors and vents in unheated areas
- Gaps in attic floors or crawl space walls
- Openings where utilities enter from outside
Sealing cracks and holes in exterior walls significantly reduces the amount of cold air reaching your plumbing system.
Sealing Methods That Work
You don’t need expensive solutions. Caulk and foam sealant handle most gaps effectively. Use silicone or acrylic latex caulk for narrow cracks, and expandable spray foam for larger openings around pipes.
For cavities where pipes penetrate framing, proper air sealing maintains warmer indoor temperatures around vulnerable water lines. Fill these spaces with foam or caulk to block cold air circulation.
In basement areas, weatherstripping around doors creates a barrier against drafts. In attics, seal around pipe penetrations where they exit to upper floors.
Simple Sealing Steps
Start by identifying problem areas on a cold day when you can feel where air enters. Use caulk for cracks under one quarter inch wide. For anything larger, expandable foam works better and provides superior insulation value.
Allow caulk to cure fully before winter arrives. Most products require 24 to 48 hours before they reach full effectiveness.
Pro tip: Inspect your home in fall while weather is still mild, then seal any drafts before December arrives so your pipes stay protected all winter long.
3. Let Faucets Drip to Keep Water Moving
One of the simplest yet most effective frozen pipe prevention strategies is letting your faucets drip during extreme cold. Moving water resists freezing far better than water sitting still inside your pipes, and this passive approach requires minimal effort on your part.
Water that stays stationary has time to crystallize and expand, creating blockages that can burst pipes. But water flowing, even at a glacial pace, continuously moves through vulnerable sections of your plumbing system. This gentle movement prevents ice formation from taking hold.
Moving water is significantly less likely to freeze compared to standing water, making slow faucet drips an effective emergency prevention method during bitter cold.
How the Drip Strategy Works
The science is straightforward. Cold temperatures need time to freeze water. When water sits motionless, it reaches its freezing point and crystallizes. A slow trickle disrupts this process by continuously replacing cold water with warmer water from your main supply line.
You don’t need a heavy stream. A small, steady drip is all that’s needed to keep water moving through pipes. This gentle flow uses minimal water while providing maximum protection against freezing.
Which Faucets to Drip
Not all faucets need dripping during cold snaps. Prioritize these locations:
- Faucets at the far end of your plumbing system
- Outdoor spigots or hose bibs
- Sinks in exterior walls or unheated spaces
- Faucets closest to exposed or uninsulated pipes
- Cold water lines rather than hot water
Letting cold water faucets drip slowly maintains flow in the pipes most vulnerable to freezing during extreme weather.
Timing Your Drips
You don’t need to run drips all winter. Activate this strategy only when temperatures drop below freezing and remain low for extended periods. Watch local weather forecasts for warnings about extreme cold or freeze watches in Belleville.
Once temperatures rise above freezing for several hours, you can stop the drips and return to normal water usage.
Water Usage Considerations
Yes, dripping faucets increase your water consumption slightly. A steady drip running for 24 hours uses approximately 5 gallons of water. Compare this to the thousands of gallons lost from a burst pipe and the repair costs exceeding $10,000, and the math makes sense.
Pro tip: Let faucets in unheated areas drip overnight during cold snaps, but turn them off during the day when indoor temperatures naturally rise and pipes warm up.
4. Open Cabinet Doors to Circulate Warm Air
Here’s a prevention strategy so simple you might overlook it: opening cabinet doors under sinks exposes pipes to warm household air. Cabinet doors trap cold air around pipes in kitchens and bathrooms, creating isolated pockets where freezing happens faster. Removing this barrier costs nothing and takes seconds.
Pipes under sinks are especially vulnerable because cabinetry insulates them from your home’s warmth. During extreme cold, these enclosed spaces can become significantly colder than the rest of your house. Opening those doors allows heated indoor air to reach pipes that would otherwise remain dangerously cold.
Opening cabinet doors during freezing weather lets warm household air circulate around pipes, significantly reducing freeze risk in kitchens and bathrooms.
Why Cabinet Doors Create Risk
Your home’s heating system works hard to warm your living spaces, but closed cabinet doors block that warmth from reaching vulnerable pipes. The air trapped inside cabinets stays stagnant and cold, especially if pipes run along exterior walls where outside cold penetrates through insulation.
Think of it this way: pipes in open areas benefit from your furnace’s warmth, but pipes hidden behind closed doors miss out entirely. This temperature difference can be the deciding factor between a pipe that survives winter and one that freezes.
Which Cabinets to Open
Focus on cabinets that house plumbing lines, particularly those in areas prone to freezing:
- Under-sink cabinets in kitchens and bathrooms
- Cabinets along exterior walls
- Lower cabinets near basement or crawl space areas
- Any cabinet housing cold water supply lines
- Bathroom vanities with exposed pipes
Opening cabinet doors during cold weather helps warm air reach pipes usually insulated by cabinetry, decreasing freezing likelihood significantly.
Implementation and Safety
Open these cabinet doors when temperatures drop below freezing and remain low. You don’t need to leave them open all winter, just during freeze warnings and extreme cold events affecting Belleville.
If you have small children or pets, ensure nothing hazardous is stored at their level. Most under-sink areas contain cleaning supplies that should be safely secured anyway.
This passive approach requires no tools, products, or ongoing maintenance. Simply pull open the doors and let nature do the work.
Pro tip: Open cabinet doors in the evening when outdoor temperatures drop, then close them during warmer daytime hours to maintain heating efficiency in your home.
5. Maintain Consistent Indoor Temperatures
Your thermostat is one of your most powerful frozen pipe prevention tools. Steady indoor temperatures prevent the cold spots where pipes freeze, and maintaining consistent heat day and night protects your plumbing even when you’re away from home or sleeping.
Temperature fluctuations create risk. Every time you lower your thermostat significantly, pipes in poorly insulated areas cool down rapidly. Unheated spaces like basements, attics, and crawl spaces become even colder when your furnace isn’t actively heating, giving freezing conditions the perfect opportunity to develop.
Maintaining steady indoor temperatures prevents cold spots near plumbing and significantly reduces freezing risk, especially in unheated or poorly insulated areas.
The Temperature Sweet Spot
You don’t need tropical warmth running constantly. Most experts recommend keeping your home at a minimum of 55 degrees Fahrenheit during winter months, even when you’re away. This baseline temperature provides enough ambient warmth to protect pipes in most scenarios.
For homes with pipes in particularly vulnerable locations, 60 degrees offers additional safety margin. Keeping the thermostat set consistently prevents cold spots that allow pipes to freeze in unheated or poorly insulated areas.
When Away from Home
Traveling during winter presents unique challenges. Never turn off heat completely, even for short trips. Homes left unheated for several days can develop dangerously cold interior temperatures, creating conditions where even insulated pipes freeze.
Set your thermostat to at least 55 degrees before leaving town. Ask a trusted neighbor to check on your home periodically. Many modern thermostats allow remote adjustment via smartphone, giving you control even from vacation.
Nighttime Heating Strategy
Resist the temptation to lower heat at night to save energy. The few dollars saved on heating costs disappear instantly if a frozen pipe bursts and requires thousands in repairs. Keep nighttime temperatures the same as daytime settings.
If energy efficiency concerns you, focus on other improvements like better insulation or sealing air leaks rather than lowering heat below safe thresholds.
Additional Temperature Considerations
Consider these scenarios that require special attention:
- New construction with poor insulation
- Older homes with gaps in original insulation
- Pipes running along exterior walls
- Homes in basements with minimal heating
- Extended absences during freezing weather
Sudden temperature drops allow pipes to freeze in vulnerable areas, especially when heat is turned off completely.
Pro tip: Program your thermostat to maintain at least 55 degrees automatically during winter, so you never accidentally lower heat below safe levels when leaving town.
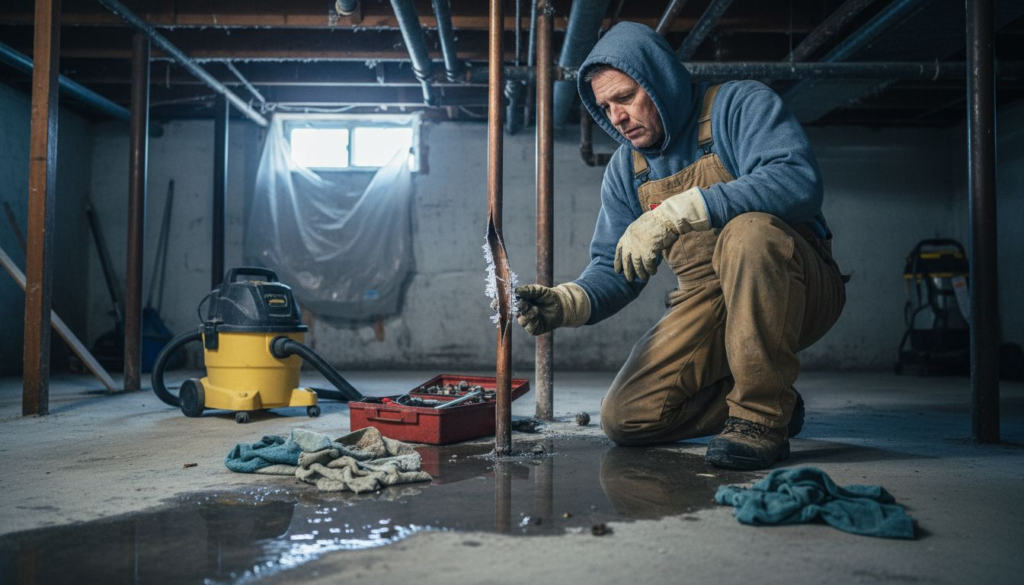
6. Disconnect Garden Hoses and Drain Outdoor Faucets
Fall is the perfect time to prepare outdoor plumbing for winter’s arrival. Disconnecting garden hoses and draining outdoor faucets prevents water from sitting in exposed lines where it freezes and expands, potentially damaging pipes that run back into your home.
Water trapped in hoses and outdoor faucets has nowhere to go when it freezes. Frozen water expands with tremendous force, cracking hose bibs and bursting supply lines connected to your main plumbing system. Prevention takes just minutes but saves thousands in potential repairs.
Removing garden hoses and properly draining outdoor faucets before freezing weather arrives protects exterior plumbing from freeze damage and burst pipes.
Why Outdoor Faucets Are Vulnerable
Outdoor hose bibs sit exposed to the elements with little protection from cold air. Water inside hoses and faucet lines freezes before interior pipes because there’s no ambient household warmth to protect them. A single frozen hose bib can damage the supply line running back through your home’s exterior wall.
Many homeowners forget about outdoor water sources until spring arrives. By then, damage has already occurred.
The Proper Shutdown Process
Following the correct sequence protects your entire outdoor water system. Start inside your home where shut-off valves supply outdoor faucets. Turn these valves completely off to stop water flow to exterior hose bibs.
Next, go outside and open the hose bibs fully to allow any remaining water to drain out completely. Leave them open throughout winter so water can escape if any still remains. This two-step process prevents pressure buildup that could damage pipes.
Disconnect and drain your garden hoses completely. Store them inside a garage, basement, or shed where they won’t freeze. Coiled hoses left outside trap water inside their curves, which then freezes and cracks the material.
Step-by-Step Shutdown
Follow this sequence before the first freeze warning:
- Locate and turn off interior shut-off valves for outdoor faucets
- Go outside and open hose bibs fully
- Disconnect garden hoses from all outdoor faucets
- Drain hoses completely by holding them at an angle
- Store hoses in a protected, climate-controlled location
- Leave hose bibs open throughout winter months
Removing garden hoses before freezing temperatures protects exterior plumbing and prevents costly freeze damage to your home’s main water system.
Special Considerations
Some homes have frost-proof hose bibs that drain internally. Even with these advanced faucets, disconnect hoses and leave the bibs open for maximum protection. Don’t assume any outdoor faucet is completely freeze-proof.
Pro tip: Mark your outdoor shut-off valve locations with bright tape in fall, making them easy to find quickly if you need emergency access during winter.
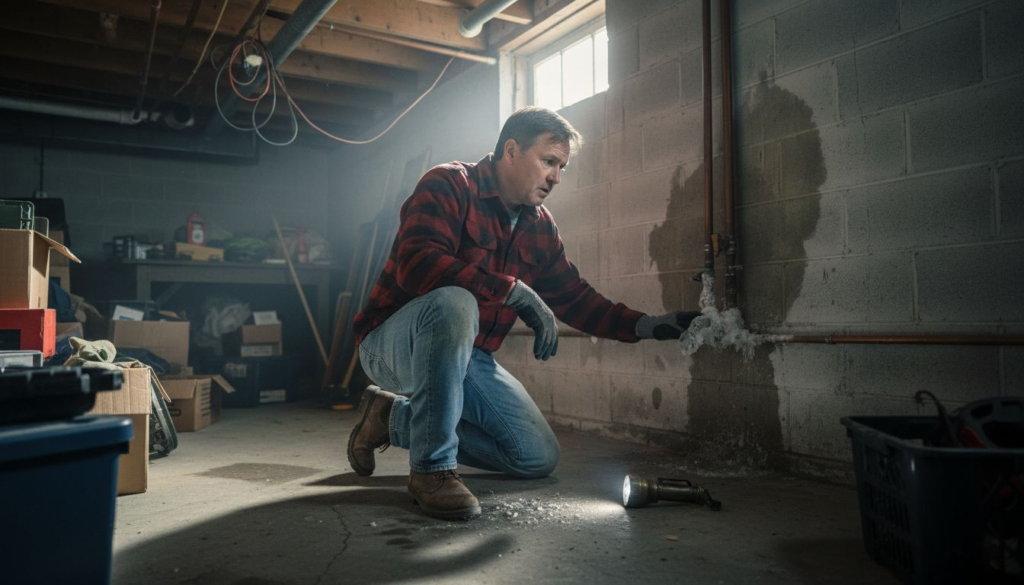
7. Know How to Shut Off Your Water Quickly
If a pipe bursts despite your prevention efforts, knowing where your main water shut-off valve is located can mean the difference between minor damage and thousands of dollars in repairs. Every homeowner should locate this valve before winter arrives and understand exactly how to operate it in an emergency.
Water flowing from a burst pipe causes damage exponentially. Every second counts when a frozen pipe cracks. Shutting off the main water supply immediately stops water from pouring into your home, limiting damage to walls, flooring, and belongings. Waiting for a plumber costs time you don’t have.
Knowing your main water shut-off valve location and how to operate it quickly can reduce water damage by up to 60 percent when a pipe bursts.
Finding Your Main Shut-Off Valve
Your main water shut-off is typically located where the water supply enters your home. In Belleville homes, this is commonly in the basement near the foundation wall or in a utility room. Some older homes have the valve outside near the street or under a curb box.
Look for a valve with a handle attached to a pipe coming from underground. It may be painted blue or marked with water company tags. If you can’t locate it immediately, ask your water utility company or a local plumber for help.
Common Shut-Off Locations
Search these areas first when looking for your valve:
- Basement near the foundation or utility area
- Crawl space along exterior walls
- Utility closet or mechanical room
- Garage near the entry point from outside
- Under a curb box in your front yard
- Inside a pit or box buried at ground level
Understanding main water shut-off valve location is critical to minimize damage when a frozen pipe bursts unexpectedly.
How to Operate Your Valve
Most valves use one of two designs. Ball valves have a lever handle that turns 90 degrees. Turn the handle perpendicular to the pipe to shut off water. Gate valves have a round or oval handle that turns clockwise to close.
Test your valve now during mild weather. Turn it off and confirm water stops flowing from an indoor faucet. Turn it back on and verify water returns. This practice run ensures you can operate it under stress during an actual emergency.
Preparing for Emergencies
Mark your shut-off valve location clearly so anyone in your household can find it quickly. Paint it bright red or attach a bright tag. Write down its location and post instructions near your main electrical panel.
Take photos of your valve and its location. Store these photos on your phone for instant reference during emergencies. Teach all household members, including teenagers, where the valve is and how to use it.
Pro tip: Visit your shut-off valve quarterly and turn the handle slightly to ensure it moves freely; valves that stay unused can become stuck and fail when you need them most.
Below is a comprehensive table summarizing the strategies for protecting plumbing during winter as discussed in the article.
| Strategy | Description | Benefits |
|---|---|---|
| Insulate Exposed Pipes | Use pipe sleeves or fiberglass batts to protect vulnerable areas such as attics and crawl spaces. | Reduces freezing risk by up to 80%. |
| Seal Drafts Near Pipes | Apply caulk or foam sealant around gaps and cracks near plumbing. | Maintains warmer temperatures around pipes. |
| Let Faucets Drip | Allow slow water flow during extreme cold to prevent stationary freezing. | Keeps water moving, reducing freeze risk. |
| Open Cabinet Doors | Provide warm air circulation to enclosed pipes under sinks. | Protects pipes from isolated freezing points. |
| Maintain Consistent Temperatures | Keep indoor thermostat at 55-60°F during freezing periods. | Prevents temperature dips that lead to freezing. |
| Disconnect Hoses and Drain Faucets | Remove hoses and drain outdoor bibs to prevent water expansion damage. | Protects outdoor plumbing and prevents pressure buildup. |
| Locate Main Water Shut-Off | Identify and mark the main valve to quickly stop flow in emergencies. | Minimizes water damage from burst pipes. |
Protect Your Belleville Home From Frozen Pipes Today
Frozen pipes can cause devastating damage during harsh winters in Belleville. The challenges highlighted in the article like insulating exposed pipes, sealing drafts, and maintaining consistent indoor temperatures show how vulnerable your plumbing system can be. If you are worried about costly repairs from burst or frozen pipes, taking proactive steps is critical. Don’t let a small crack or unprotected pipe turn into an expensive emergency.
Davinroy Plumbing specializes in comprehensive frozen pipe prevention and repair services tailored for Belleville homeowners. Whether you need expert guidance on insulation, quick repairs for damaged pipes, or advice on protecting outdoor faucets and valves, we have you covered. Visit our plumbing services page to learn how we can help safeguard your home’s water system this winter. Act now to avoid thousands of dollars in damage and make sure your home stays warm and worry-free. Contact us today at https://davinroyplumbing.com and secure your pipes before the cold hits.
Frequently Asked Questions
How can I prevent my pipes from freezing in winter?
To prevent your pipes from freezing in winter, insulate exposed pipes in unheated areas like attics, basements, and exterior walls. Use foam pipe sleeves or fiberglass insulation to cover these vulnerable pipes, effectively reducing your risk of freeze damage by up to 80%.
What steps should I take to seal drafts near my plumbing?
Start by inspecting areas where pipes penetrate exterior walls or other unheated areas. Use caulk for small gaps and expandable spray foam for larger openings to seal these drafts, which can significantly help in keeping the surrounding air warm enough to prevent freezing.
Which faucets should I let drip during extremely cold weather?
Prioritize letting faucets that are at the far end of your plumbing system, outdoor spigots, and sinks in unheated spaces drip during cold spells. A small, steady drip can keep water moving through vulnerable pipes, helping to prevent freezing.
How do I properly disconnect outdoor hoses for winter protection?
Thoroughly disconnect garden hoses from outdoor faucets and drain them completely before the first freeze. This prevents water from freezing inside the hoses and causing damage, and store the hoses in a climate-controlled area to protect them.
Why is it important to know where my main water shut-off valve is located?
Knowing the location of your main water shut-off valve is crucial for quickly stopping water flow in case of a burst pipe. Regularly practice operating the valve to ensure you can shut it off promptly during an emergency, potentially reducing water damage by up to 60%.