Facing water heater trouble can feel overwhelming for Belleville homeowners, especially when every dollar counts. Tackling simple repairs yourself does more than ease financial strain, it gives you control over your home’s comfort. With a careful approach, you can spot visible issues, prevent disasters, and restore hot water safely. This guide highlights visual inspection catches most problems before they become emergencies, putting practical fixes within your reach.
Table of Contents
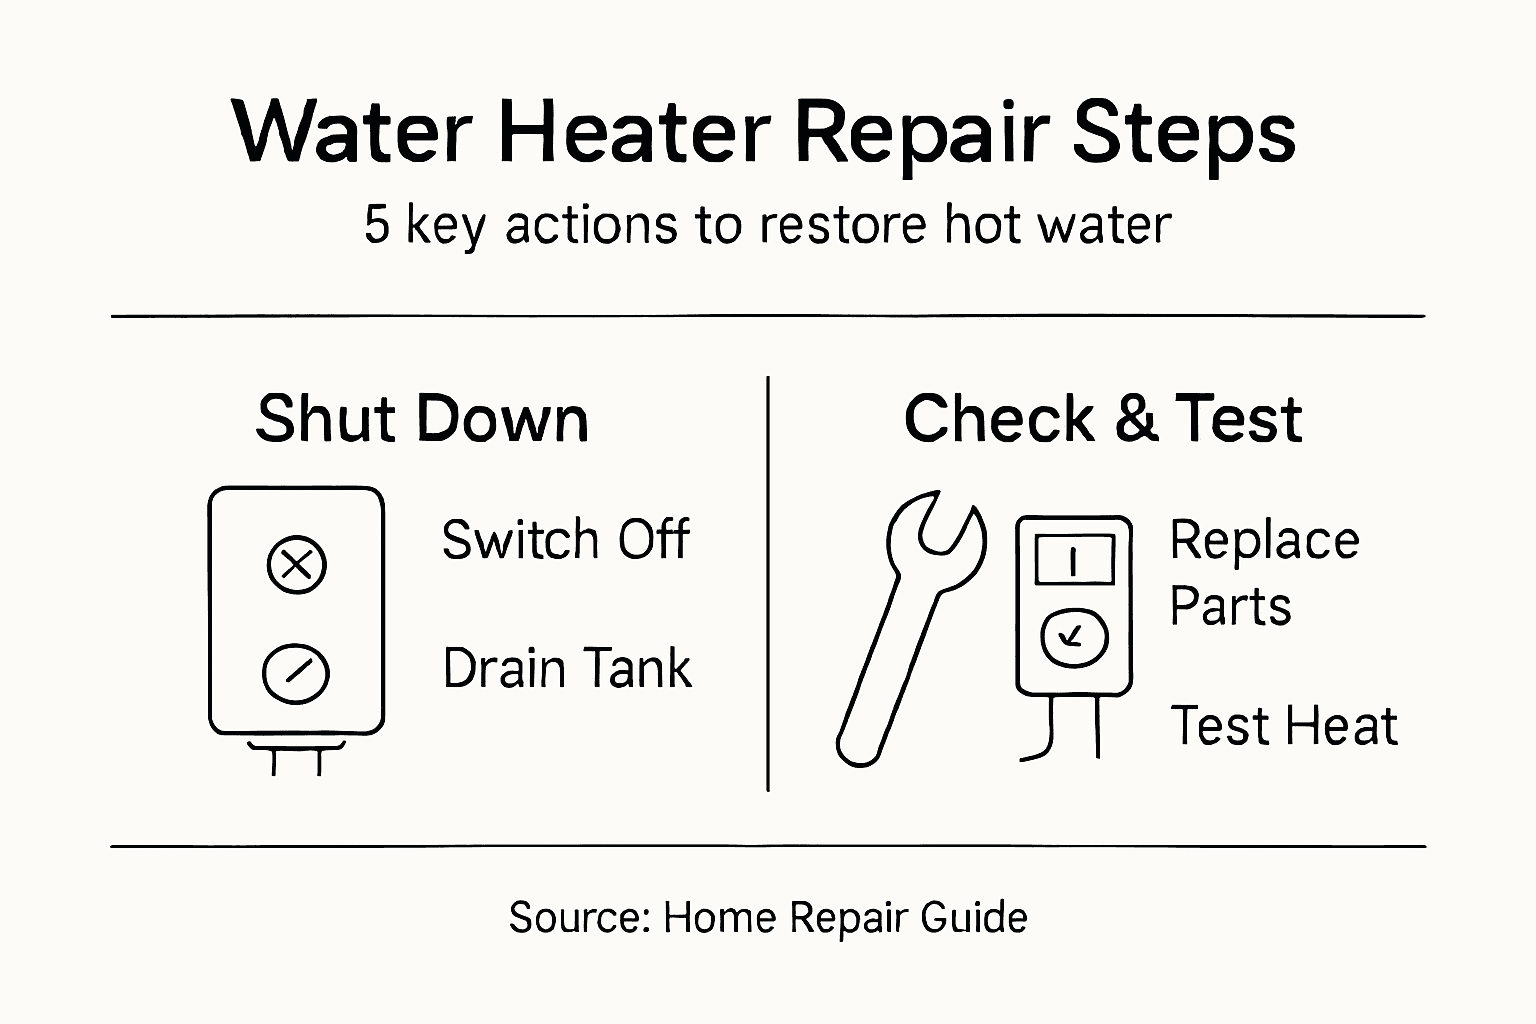
- Step 1: Inspect Water Heater For Visible Issues
- Step 2: Turn Off Power And Drain Tank Safely
- Step 3: Replace Faulty Components Correctly
- Step 4: Restart System And Check For Leaks
- Step 5: Test Water Temperature For Proper Function
Quick Summary
| Key Point | Explanation |
|---|---|
| 1. Inspect Water Heater Regularly | A visual inspection can reveal simple issues that are fixable, potentially saving you money on repairs. |
| 2. Turn Off Power and Drain Safely | Always shut off power and let your tank cool before draining to prevent burns and electrical hazards. |
| 3. Replace Faulty Components Carefully | Ensure you purchase the correct parts for your model to maintain safety and efficiency in your water heater. |
| 4. Check for Leaks After Restarting | Inspect all connections for leaks after refilling; small leaks can cause significant damage over time. |
| 5. Test Water Temperature for Safety | Verify that your water heater heats to the safe range of 110-120°F to prevent scalding and ensure efficiency. |
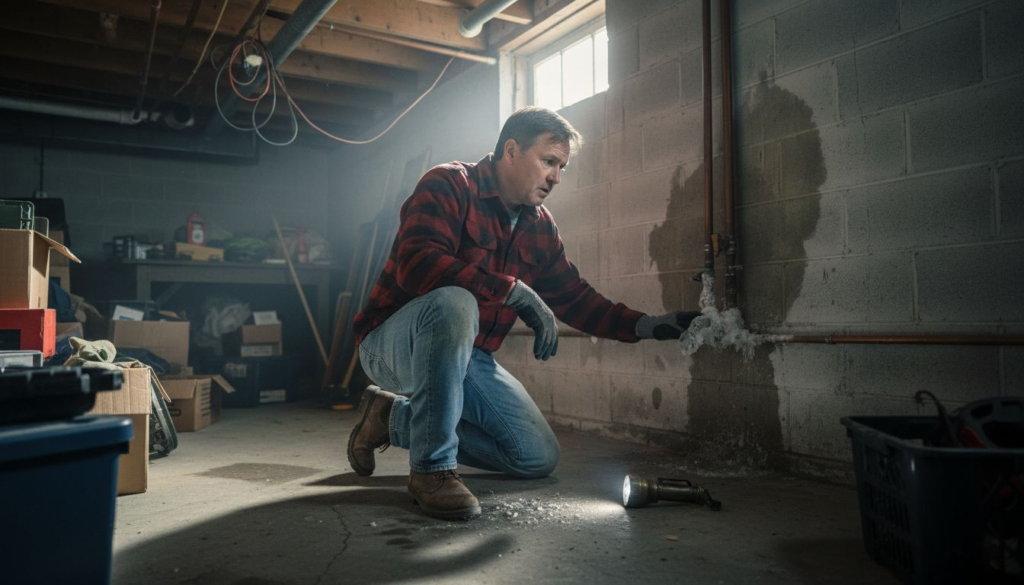
Step 1: Inspect water heater for visible issues
Before you call in professionals or buy replacement parts, take time to examine your water heater closely. A thorough visual inspection often reveals simple problems you can fix yourself or helps you describe the issue accurately to a technician. This step takes just 15 minutes and could save you hundreds of dollars.
Start by turning off the power to your water heater at the circuit breaker. If you have a gas unit, turn the dial to the “Pilot” setting. Safety first, always.
Now walk around your tank and look for these common warning signs:
- Rust or corrosion on the exterior, especially around seams or the bottom
- Leaks or puddles underneath or around the base
- Discoloration or stains that suggest water damage
- Loose or damaged insulation wrapping around the tank
- Cracks or dents in the metal casing
- Sediment buildup visible through the drain valve area
- Leaking valves like the temperature and pressure relief valve
When inspecting for material defects, pay close attention to the water connections and fittings where pipes attach to your tank. These joints are common leak points. Check both the cold water inlet and hot water outlet lines for moisture or dripping.
Look at the discharge pipe from your relief valve. If you see water stains or wetness along its path, that indicates the valve is opening and releasing pressure, which could mean your tank is overheating.
Examine the temperature and pressure relief valve itself. This safety device sits near the top of your tank. If it’s corroded, stuck, or leaking, it needs attention. Proper relief valve installation and discharge piping is essential for safe operation.
Check around the base where your tank sits. Standing water or mineral deposits suggest a slow leak developing inside the tank. This often means your water heater is nearing the end of its life.
Visual inspection catches most problems before they become emergencies. Taking time now prevents costly water damage later.
If you spot obvious issues like significant corrosion or active leaks, don’t delay getting professional help. However, if everything looks relatively clean and dry, move forward with diagnosing what’s causing your hot water problems.
Pro tip: Take photos of any issues you find. These pictures help you explain problems clearly to a plumber and serve as documentation if you need to file insurance claims for water damage.
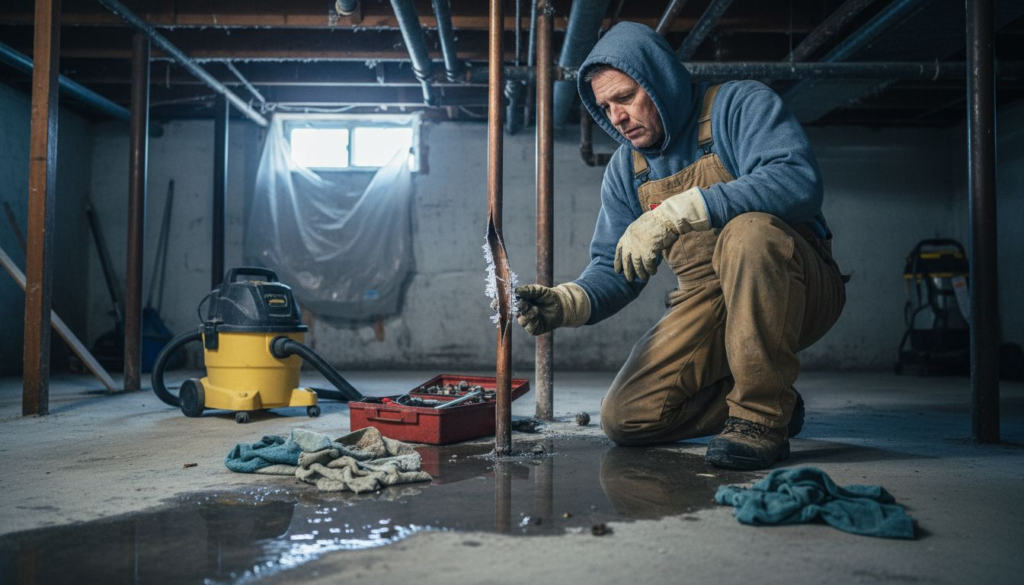
Step 2: Turn off power and drain tank safely
Before you work inside your water heater, you must shut down the power supply and empty the tank. This protects you from electrical shock and scalding water while you inspect or repair components. The entire process takes about 30 minutes and is straightforward if you follow the right sequence.
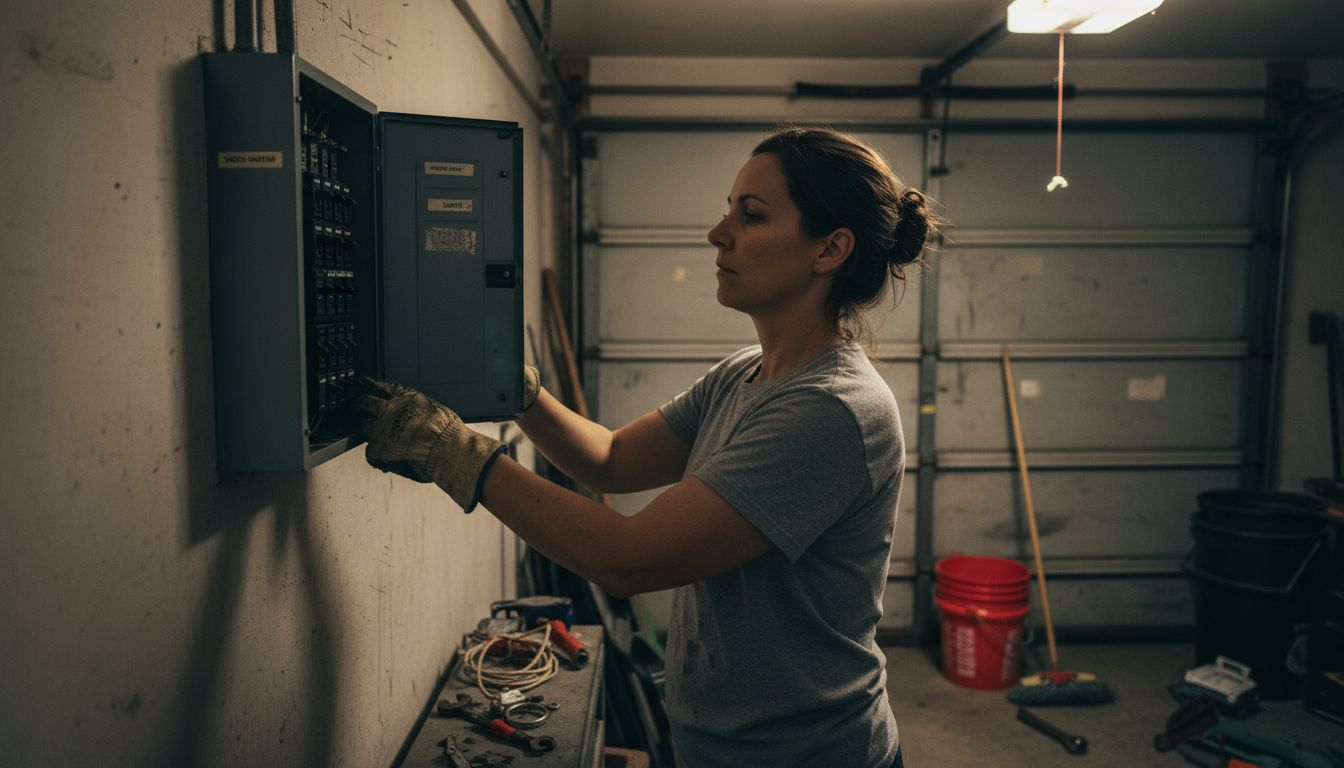
Start by turning off the power supply. For electric water heaters, switch off the breaker at your panel. For gas heaters, turn the control knob to the “Off” position. Wait a few minutes to ensure no power is flowing to the unit.
Next, close the cold water inlet valve. This is the valve on the pipe entering the top of your tank. Turn it clockwise until it stops. This prevents new water from flowing in as you drain.
Now comes the waiting part. You want the water inside to cool before draining. Hot water causes burns and makes the process uncomfortable. Let it sit for at least 30 to 60 minutes, especially if you just turned off a fully heated tank.
When you’re ready to drain, follow these steps:
- Attach a garden hose to the drain valve at the bottom of your tank
- Route the hose to a safe drainage location like a floor drain or outside
- Open the drain valve by turning the handle counterclockwise
- Let the tank empty completely until water stops flowing
The water draining from your tank will be hot initially and may contain sediment. This is normal. Properly draining and flushing your water heater tank removes mineral buildup that reduces efficiency and shortens tank life.
Once the tank is empty, you can safely access internal components or perform maintenance. If you encounter resistance when opening the drain valve, don’t force it. The valve may be stuck from mineral deposits, and forcing it could damage it.
Never skip cooling time before draining. Scalding water can cause serious burns in seconds, and steam can cause additional injury.
If your drain valve won’t open after gentle attempts, or if you’re uncomfortable with any step, contact a professional. Davinroy Plumbing offers water heater services in the Belleville area for situations like this.
Pro tip: Capture the first bucket of drained water in a separate container before attaching the hose—this sediment-heavy water can clog your drain or outdoor area, so dispose of it separately.
Step 3: Replace faulty components correctly
Replacing worn-out parts like heating elements, thermostats, or relief valves can restore your water heater to working order without replacing the entire tank. Getting the right component and installing it correctly ensures your system operates safely and efficiently. This step requires attention to detail and the right tools, but most homeowners can handle it.
First, identify exactly which component is failing. Common problem areas include the heating element (electric units), thermostat, temperature and pressure relief valve, or dip tube. Your inspection from earlier should have revealed clues about what needs replacement.
Next, order the correct replacement part. This is crucial. Your water heater model number determines compatibility. Find this number on the label attached to your tank, usually near the top. When you order online or visit a supplier, provide this model number to ensure you get the exact match.
Consider these factors when selecting replacement components:
- Voltage and wattage for heating elements must match your original
- Size and material of relief valves affect performance
- Thermostat settings should match your heater’s specifications
- Energy efficiency standards for modern components offer better performance
Proper component replacement ensures compliance with current energy codes and safety standards. Older replacement parts may not meet today’s requirements.
Before installation, turn off power and drain the tank using the steps from earlier. You cannot safely replace most components with water and power present. Let the tank cool completely.
When you’re ready to install, follow your component’s instruction manual exactly. Each part has specific steps. For heating elements, you’ll need a special socket wrench. For relief valves, use thread seal tape on the connections. For thermostats, ensure proper wiring connections.
Wrong components cause leaks, poor heating, or system failure. Always verify model compatibility before purchasing and installing.
If you’re uncertain about any step, don’t guess. A $50 professional consultation beats a $500 mistake. Some repairs also require permits and inspections in your area. Davinroy Plumbing can handle these situations professionally if needed.
Pro tip: Keep your original component as a reference when ordering the replacement—take it to the supplier to compare specifications and avoid ordering the wrong part.
Step 4: Restart system and check for leaks
You’ve completed the repair work, and now it’s time to bring your water heater back online. The startup process requires careful attention because even small leaks can cause water damage or safety issues. Take your time during this final step to catch problems before they become expensive.
Begin by refilling the tank slowly. Open the cold water inlet valve that you closed earlier. You’ll hear water flowing into the tank. This process takes several minutes. Don’t rush it, as air pockets need to escape through the hot water line.
Once water starts flowing from your faucets, open a hot water tap nearby to release trapped air. Let it run for 30 seconds, then close it. Now restore power to your unit. For electric heaters, flip the breaker back on. For gas heaters, turn the control knob to the desired temperature setting.
Wait about 15 minutes for the heating process to begin, then perform a thorough leak inspection:
- Check all valve connections at the top and bottom of the tank
- Inspect the drain valve for drips or seeping
- Examine all piping connections where water lines attach
- Look at the relief valve and its discharge line
- Monitor the tank exterior for any moisture
Pay close attention to the temperature and pressure relief valve discharge piping that runs down the side of the tank. This line must drain freely without pooling water. Any standing water under the discharge line indicates the relief valve is opening repeatedly, which signals a problem.
For gas water heaters, smell around the unit carefully. You should not detect any gas odor. If you smell rotten eggs or natural gas, stop immediately and contact Davinroy Plumbing for professional assistance.
Allow the water heater to run for at least 30 minutes before concluding your inspection is complete. Small leaks may not appear immediately. Check again after the tank reaches full temperature.
Catching leaks immediately prevents costly water damage to your home. Small drips today become big problems tomorrow.
Pro tip: Place white paper towels under all connections and valves to make even tiny leaks visible—water will darken the towels, revealing problems you might otherwise miss.
Step 5: Test water temperature for proper function
Now that your water heater is running again, you need to verify it’s heating water to the right temperature. Testing temperature confirms your repair worked and ensures your system operates safely and efficiently. This quick test takes just a few minutes and requires only a basic thermometer.
Wait at least one hour after restoring power before testing. Your tank needs time to heat the water inside to the set temperature. This waiting period ensures accurate results rather than catching water that’s still warming up.
Gather a simple thermometer to measure temperature. A basic kitchen or bathroom thermometer works fine. Digital thermometers give faster readings than analog ones, but either works. Avoid touching the thermometer to the metal faucet itself, as this gives false readings.
Turn on a hot water faucet at your kitchen sink or bathroom and let it run for 30 seconds. This clears cooler water from the pipes. Hold your thermometer under the running water stream, not touching the faucet.
Record the temperature you see. For most households, aim for between 110 and 120 degrees Fahrenheit. This range balances comfort with safety while preventing scalding injuries. Proper water temperature safeguards against scalding risks and maintains water quality in your home.
Here’s a summary of common water heater components and their maintenance impact:
| Component | Typical Purpose | Maintenance Impact |
|---|---|---|
| Heating Element | Heats water in electric units | Reduced efficiency if faulty |
| Thermostat | Regulates water temperature | Safety risk if miscalibrated |
| Relief Valve | Prevents excess pressure | Critical to prevent explosions |
| Dip Tube | Directs cold water flow | Poor hot water supply if damaged |
| Insulation | Retains heat in tank | Higher energy bills if degraded |
Here’s a quick overview of recommended water temperature settings:
| Location | Ideal Temperature (°F) | Safety Note |
|---|---|---|
| Kitchen Faucet | 110–120 | Prevents scalding risk |
| Bathroom Faucet | 110–120 | Safe for children and elderly |
| Laundry Room | 120 | Supports effective cleaning |
| Entire Home | 110–120 | Balances safety and comfort |
If the temperature is significantly lower than expected, check these common issues:
- Thermostat may be set too low. Adjust it slightly higher and wait 30 minutes
- New heating element or thermostat may need time. Allow 2 to 3 hours of heating
- Mixing valve installed. This device intentionally reduces temperature for safety
- Sediment buildup inside tank. This reduces heating efficiency and requires flushing
If water temperature exceeds 130 degrees, your thermostat may be set too high. Lower it immediately to prevent scalding and reduce energy consumption. Test again after 30 minutes.
Repeat your temperature test at two or three different faucets throughout your home. Hot water should reach similar temperatures everywhere. Significant differences suggest pipe insulation issues or mixing valve problems.
Consistent water temperature across all faucets indicates your repair was successful. Temperature variations suggest additional problems need attention.
Pro tip: Keep a simple log of your water temperature readings over a week—this shows you whether your system maintains stable temperature consistently, helping identify developing problems early.
Keep Your Hot Water Flowing with Expert Plumbing Solutions
Struggling with a malfunctioning water heater can disrupt your entire routine and cause costly damage if left unchecked. This article highlights common challenges like faulty heating elements, leaking valves, and sediment buildup that affect water temperature and safety. If you want to avoid the frustration of cold showers and the risk of water damage, professional help is just a click away. Discover expert repair and maintenance options to restore your water heater’s reliable performance.
Explore comprehensive plumbing solutions in the Belleville area by visiting our Plumbing Archives to learn how we can support your home in staying safe and comfortable. For trusted water heater repairs and maintenance, turn to Davinroy Plumbing, where our team quickly diagnoses problems and offers durable fixes. Don’t wait until a small issue becomes an expensive emergency. Contact us today and get your hot water flowing smoothly again.
Frequently Asked Questions
How do I inspect my water heater for visible issues?
Start by turning off the power supply and inspect the exterior for rust, leaks, or damage. Check the water connections and fittings for moisture, and look for signs of sediment buildup around the drain valve.
What steps should I follow to drain my water heater safely?
First, turn off the power supply and close the cold water inlet valve. Attach a garden hose to the drain valve, route it to a safe drainage location, and then open the drain valve to let the tank empty completely.
How can I determine which components of my water heater need replacement?
Identify faulty components by referring to your initial inspection. Common issues involve the heating element, thermostat, or relief valve, which often display signs of wear or malfunction.
What should I do after replacing components in my water heater?
After replacing any faulty components, refill the tank slowly and restore the power supply. Monitor for leaks at all connections and ensure the temperature is set correctly to avoid safety hazards.
How can I test my water heater to ensure it’s heating water properly?
Wait at least one hour after starting the system to test the water temperature. Use a thermometer to check the temperature from a hot water faucet; it should ideally be between 110 and 120 degrees Fahrenheit for safe and efficient operation.
What immediate actions can I take if my water heater temperature exceeds safe levels?
If the temperature exceeds 130 degrees Fahrenheit, lower the thermostat immediately to prevent scalding. Recheck the temperature in about 30 minutes to ensure it’s within the safe range.